Outlander Recap: Stupid Hero Complex
Season 7 Episode 8 Editor’s Rating4 stars ****
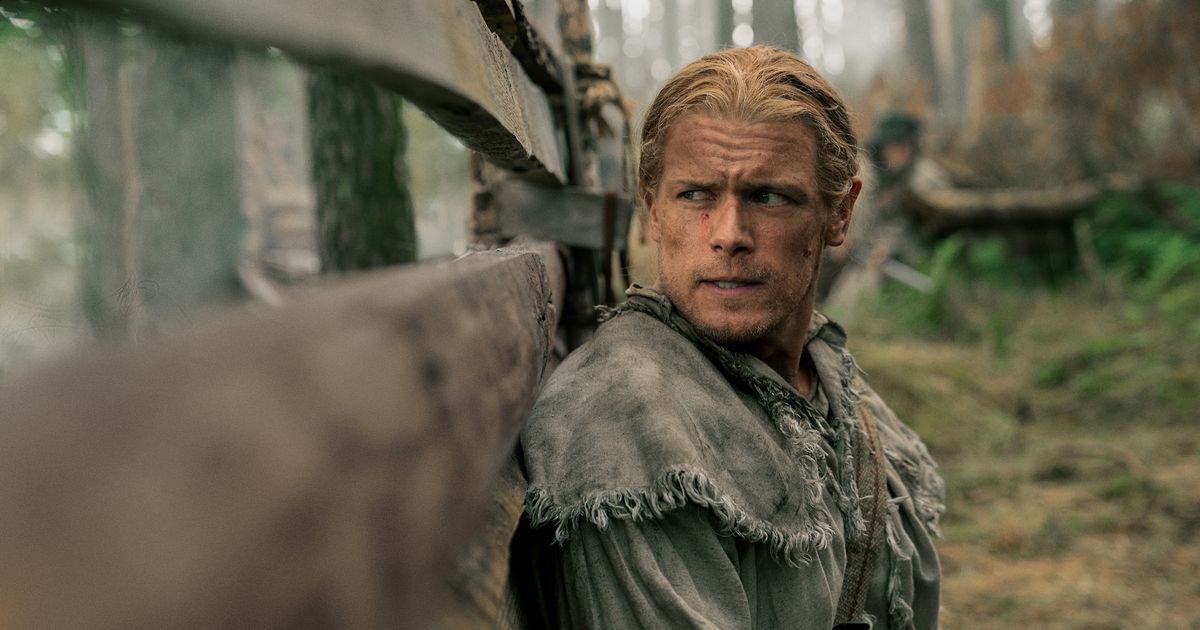
Photo: Starz Ah yes, Outlander, the show that wonders, Did a time-traveling doctor have the chance to stop Benedict Arnold from betraying his country and decide, Nah, I’ll just let him do it? This show is the best. That being said, this midseason finale could have used like 50 percent less Benedict Arnold. A weird sentence to write but true nonetheless. Don’t get me wrong, it’s always fun to watch Claire run into these historical bigwigs (her face upon learning she just had a cute li’l chat with Benny is spot-on), but Outlander is wrapping up the Frasers’ time in the Revolutionary War and there are a lot of big feelings about it. Give me more of Claire and Jamie angsting about life and death and war and less about one man’s motivations for betrayal. Has all this time spent relearning details about the war for a show that was supposed to be about hot Scottish people having sex made me cranky? Probably. I won’t apologize!
Unsexiness aside, this half of season seven has been pretty compelling, emotionally speaking, especially in regard to Claire and Jamie’s relationship. It’s not anything new to see one or both of them in danger at any given time, and perhaps it’s because they’re older or perhaps it’s the immensity of the Revolutionary War, but they’ve never seemed as scared as they have this season — and it has only made them more interesting as characters and a couple. Many times, Claire and Jamie are almost comically brave, so to see them struggle with the trauma they’re experiencing at what feels like literally every turn really raises the stakes. There’s more to dig into here.
The episode picks up where we last left off — with Jamie unconscious on the Saratoga battlefield. There’s a woman scavenging the dead bodies who seems to want to eat Jamie and not in the fun way, in the cannibal way. Thankfully, Claire, who has been searching for Jamie all night after he doesn’t return to the camp, arrives at the exact right moment and fights off the woman and her son with a sword. She says, “I will kill you! Just fucking try me,” and it is awesome.
Jamie’s mostly okay. He has a hand injury that Claire can easily repair, but that’s not the point. Claire was terrified when Jamie didn’t return, and she is livid that he very obviously ran into the middle of the battle when he was supposed to stay out of it (he’s part of the riflemen, remember?). She is very much over Jamie’s “stupid hero complex,” and you know what? I get it. She’s had to watch this man almost die repeatedly; that seems exhausting. Can’t he do regular dumb man stuff like go out golfing all day with his buddies and come home just drunk enough to be annoying and recount every single drive he took while standing in front of the open refrigerator door shoveling leftovers from her dinner into his mouth? Can’t you do that for once, Jamie? He can’t. But he can give her a heartfelt explanation about fighting to save as many men as possible because it is right and good. Claire feels guilty, but she’s not thrilled that Jamie’s hand heals quickly enough for him to join the Second Battle of Saratoga because she knows she has to let him go. That’s the man she loves — blood of her blood and all that jazz.
Claire also knows this is bigger than her husband. In an emotional conversation with Denny, who is in shock over all the violence and death around him, Claire is adamant that what they’re fighting for is worth it. And she would know, right? It’s also why she elects to refrain from saving Benedict from himself — the outcome of the war is too important to mess with how things are supposed to play out. Still, you can’t blame her for wishing her husband had nothing to do with any of it. Just like you can’t blame Denny, an exiled Quaker, for questioning the violence of it all. He’s not the only Hunter grappling with how his religious beliefs fit into the world he has decided to take part in: All those moony eyes Rachel and Ian have been making finally lead to them admitting they have real feelings for each other. Well, first it leads to Ian kissing Rachel and then Rachel slapping Ian for being so forward, but then it leads to them admitting they’re in love. Unfortunately, both of them know Ian’s whole deal (violence, murder, cute li’l smile) is in direct opposition to Rachel’s religion. They decide it may be best not to fully go there, even if no one told their hearts the news! Rachel’s going to get a real taste of Ian’s way of life, though, since at the end of the episode, Arch Bug appears. Once he realizes who she is to Ian, he gets a real “I’m gonna make good on my threat of revenge” look on his face. Will loving Ian be worth it in the end? Time will tell!
Enough about love; let’s get back to war. The Second Battle of Saratoga is upon us (two weeks after the first), and the fighting is 2Fast 2Furious. Eventually, Benedict orders Jamie to shoot his cousin Brigadier General Simon Fraser — what a fever dream of a sentence — but Jamie can’t do it. Regardless of the color he’s wearing, that man is kin. Instead, he fires his rifle at a nearby soldier’s hat and lets someone else in the unit kill Simon. Jamie is upset after watching his cousin die right in front of him, but he’s also distracted: He realizes the soldier he almost killed with his own bullet is, you guessed it, William.
The show has been setting this moment up for eight episodes, and when it arrives, it’s devastating for Jamie. With Simon down, the British army is in disarray. Benedict leads the men forward, and eventually they surround their enemies and take their stronghold. The entire time, however, Jamie lives in fear that William will be killed. He sees his son everywhere. It’s paralyzing.
But it does end. The Continental Army is victorious. In the aftermath, a few curious things happen — and I’m not just talking about Claire assisting Ben A. with his heel turn. In a moment of post-surrender truce, General Burgoyne honors a dying Simon’s wishes to spend his last moments with kin, which means Jamie and Claire are asked to visit the British side. It’s a lovely scene between Jamie and his cousin. They speak Gaelic. They reminisce about their childhood. And once Simon dies, Jamie sets things up in the tent to honor the Highlander tradition of allowing an exit for the soul.
Jamie has another charged moment over in enemy territory. He comes face-to-face with William. You can feel the nerves pouring out of him. He doesn’t want to say anything wrong or anything that would give away who he really is to him, but he so badly wants to speak to his son. So Jamie gives him his own hat and tells him he owes him one. It’s not much, but it is just strange enough that you can see some wheels start turning in William’s head.
Jamie assumes it will be the only time he ever speaks to his son as an adult. Part of the terms of surrender include sending all of the British men involved back to England — they won’t be allowed to fight in this war anymore. William will be safe. There is one other surprisingly positive outcome of the surrender: Burgoyne will agree to the terms only if General Gates agrees to help them get Simon’s body back to Scotland. Once again, the duty falls on Jamie.
Has a man ever been so thrilled to haul a relative’s dead body across an ocean? Sure, the circumstances are less than ideal, but Jamie has just earned a ticket out of the war and back to Scotland and he can’t wait to tell Claire. Finally, they’re going home.
Speaking of some lengthy travel plans, over in 1980, Roger and Bree realize that Rob must have taken Jem through the stones to get the Jacobite gold that Jamie hid in the Spaniard’s cave. They know Rob won’t kill Jem because he needs him, yet THE GUY TIME-KIDNAPPED THEIR SON. Roger doesn’t hesitate. He knows the only course of action is to go through the stones, track down Rob Cameron, and save his son. Roger has never been hotter. In a fun little twist, Buck demands to go too. Roger will need his help back in Buck’s time, and they are family, after all. Buck wants to do this for his clan. So Bree and Mandy say good-bye, and Roger and Buck head through the stones at Craigh na Dun, unsure of what awaits them on the other side.
Let’s not end on such an ominous note, though, okay? This episode does have quite a happy ending. We find Claire, Jamie, and Ian at the tail end of their journey across the sea. In a hilarious callback, Jamie is once again plagued with seasickness. A great Highlander felled by an upset stomach regardless of how much he wants to represent the “dignity of the American cause” on this very English ship.
It’s a nice bookend to another, much more emotional callback. In between the two battles, there’s a scene in which Jamie and Claire watch as Daniel Morgan tries to fire up the crowd against the Brits by revealing how depraved and monstrous they are — he pulls off his shirt to reveal a back scarred by hundreds of lashes. It’s exactly like Jamie’s, but Daniel is the one using those scars to motivate and manipulate a crowd; Jamie was an unwilling pawn in his uncle’s marketing tactics for the Jacobite cause. Both Jamie and Claire look like they’ve seen a ghost. Those two will forever and always be haunted by the past, won’t they?
But the bit on the ship with Jamie refusing acupuncture? A much lighter moment for the Frasers to revisit. And before they know it, the boat has reached land. Jamie, Claire, and Ian step out onto the deck of the ship and, for the first time in decades, Jamie is looking at his beloved Scotland. The three of them are in tears. We all are.
VULTURE NEWSLETTER
Keep up with all the drama of your favorite shows!This site is protected by reCAPTCHA and the Google Privacy Policy and Terms of Service apply. Vox Media, LLC Terms and Privacy Notice
<
p aria-hidden=”true”>By submitting your email, you agree to our Terms and Privacy Notice and to receive email correspondence from us.





![iFi's GO Bar Kensei Dongle DAC Supports K2HD Technology With Some Samurai Swagger [Updated] iFi's GO Bar Kensei Dongle DAC Supports K2HD Technology With Some Samurai Swagger [Updated]](https://i0.wp.com/cdn.ecoustics.com/db0/wblob/17BA35E873D594/33FF/45A11/QTXOLJR4xDKSNMMk2WlTgjaIlvSgcYpeU1xJzUwIoYs/ifi-go-bar-kensei.jpg?w=768&ssl=1)


